Manage Your Procore & Xero Projects
Map, Delete, and Control Project-Specific settings or Import/Export your Procore and Xero Projects.
- Refresh Project & Xero Projects
- Auto Map Procore & Xero Projects
- Add Project to Procore or Xero
- Edit Project-Specific Settings
- Delete Mapped Projects
- Resync Project Cost Codes
- Import / Export Project Mapping
Access Mapping Projects
- Login to your Smoothlink Integration
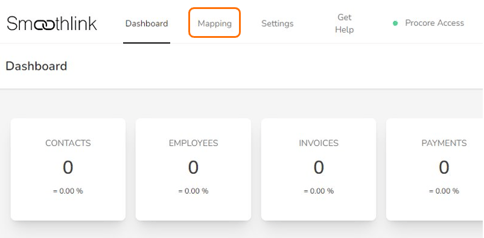
- Navigate to Mapping

- Scroll down to the Project mapping table

Refresh Project & Xero Projects
NOTE: You will need to Refresh both Procore and Xero Project lists prior to any mapping.
This ensures the most recent data from Procore and Xero is available in Smoothlink.
1. Select the Procore Projects tab

2. Click Refresh - This ensures the Project list is current

3. Repeat Steps 1 & 2 with the Xero Projects tab
Auto Map Procore & Xero Projects
Auto Map will connect Procore and Xero Project, which have matching names.
For Projects not connected using Auto Map, see Map Individual Projects
1. Select the Mapped Projects tab
2. Click the Auto Map button

You will receive a confirmation pop-up and can now see the contact under the Mapped Projects tab.
Mapping Individual Procore & Xero Projects
NOTE: You can start from either the Procore or Xero tab.
1. Select the Procore/Xero Projects tab
2. Click the Chain Link button

3. Select the matching Procore/Xero Project from the pop-up
4. Click Map

You will receive a confirmation pop-up and can now see the contact under the Mapped Projects tab.
Add Project to Procore or Xero
1. Local the Project - Use the Search field
2. Click Add Arrow icon

3. Confirm Sync

You will receive a confirmation pop-up and can now see the contact under the Mapped Projects tab.
Edit Project-Specific Settings
Project-specific settings allow you to control Smoothlink syncing for an individual project.
Smoothlink when syncing data will carry out project-specific settings first, followed by company-level settings.
1. Local the Project - Use the Search field
2. Click the Settings icon (Cog Symbol)

You can edit the following Project-Specific Settings:
- Defaults - Control Contact Payment Terms, default Invoice and Bill Cost Codes, retention syncing and more. See Settings - Defaults
- Syncing Management - Enable Project & Xero Syncing and apply Syncing Date Restriction. See Settings - Syncing Management
- Employees Mapping - Map project-specific employees and apply project-specific charge-out rates. See Mapping - New Employees
- Account Codes Mapping - Apply project-specific Account Code mapping. See Mapping - Project Specific Account Codes
Delete Mapped Projects
1. Local the Project - Use the Search field
2. Click Delete icon (Trash Can)

3. Confirm Deletion

Resync Project Cost Codes
Resync of Procore Project Cost Codes will ensure that any changes made to Procore will be reflected in the Project Settings.
NOTE: Additional Account Codes mapping maybe required after resyncing.
1. Local the Project - Use the Search field
2. Click the Resync Cost Code icon (Refresh Arrows)

3. Click Sync

Import / Export Contact Mapping
You can bulk-import Procore and Xero Projects using a CSV spreadsheet.
This will populate the Mapped Projects tab.
1. Local the Project - Use the Search field
2. Click Import/Export icon

3. Select Import Mapping or Export Mapping

Import Mapping
4. Click Choose File and select CSV spreadsheet
5. Click Let's Go

Export Mapping
4. Click Let's Go


